Integrating Okta SSO with Umbraco CMS
Ismael Machuca
22 November 2021

With the increasing number of browser based business tools, people working from home, and the ongoing drive for enhanced security, it is no wonder more and more organisations are looking to Okta to assist with their identity management.
Fortunately for us as Umbraco CMS developers integrating the two systems is relatively straight forward. And we have now integrated the two applications successfully for several Umbraco instances.
Instructions on how to integrate Umbraco CMS and Okta
These instructions assume that you already have an Okta account. If you don’t, create a free account first.
Step 1: Add an app into Okta
In the Okta Admin console:
Navigate to Applications → Applications
Click 'Create App Integration' button
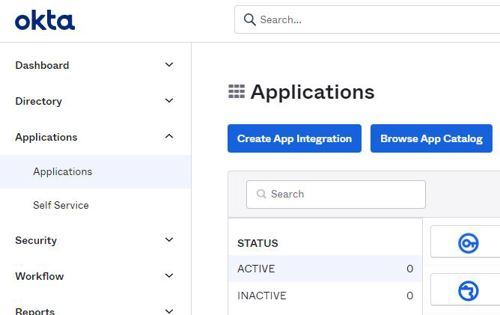
Sreenshot of Okta Admin console Choose the Sign-in method: OIDC - OpenID Connect
For Application Type, choose: Web Application
Click the 'Next' button
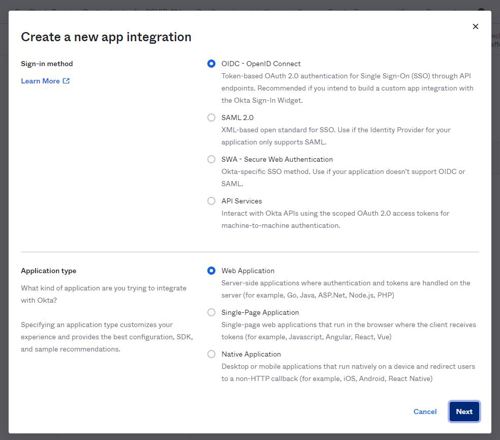
Screenshot of new app integration options Give the Application an appropriate name
Add a Login and Logout redirect URI to https://{site-domain}/umbraco
Replacing {site-domain} with your Umbraco site domain i.e. https://mysite.com/umbraco
NOTE: You will need to add an entry for all domains that intend to use this app (i.e. your production and test site URLs)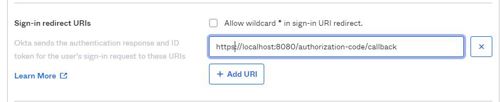
Sign-in redirect URIs screenshot Choose the appropriate Controlled access
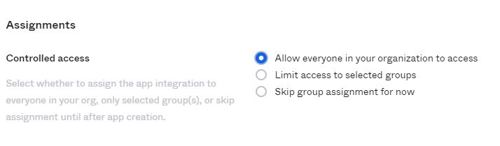
Controlled access example screenshot Click 'Save'
From the General tab, in the General Settings section, click 'Edit'
In the Grant Types select 'Implict (hybrid)' and 'Allow ID Token...'
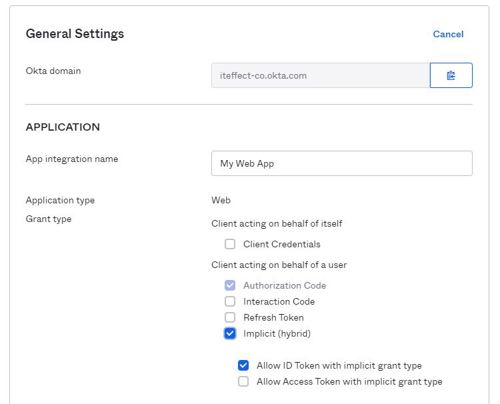
Click Save at the bottom of the form
Take a note of the Client Id, Client Secret, and Okta domain values, these will be needed for the website

Click the Assignments tab
Add the groups or people who will be able to authenticate using this app.
Step 2: Add the Okta Middleware to the Umbraco solution
First off, install the Okta.AspNet package from NuGet
1PM>Install-Package Okta.AspNet
Create a new class which inherits from UmbracoDefaultOwinStartup, I named my class OktaOwinStartup but you can call it whatever you want.
1[assembly: OwinStartup("OktaOwinStartup", typeof(OktaOwinStartup))]
2namespace UmbracoOkta
3{
4    class OktaOwinStartup: UmbracoDefaultOwinStartup
5    {
6    }
7}
I have used the OwinStartup attribute to name my start up class, this is the name we will use in the app settings later on.
Override and place your code the ConfigureUmbracoAuthentication method.
1protected override void ConfigureUmbracoAuthentication(IAppBuilder app)
2{
3    // Must call the base implementation to configure the default back  office authentication config.
4    base.ConfigureUmbracoAuthentication(app);
5    var oktaOptions = new OktaMvcOptions
6    {
7        OktaDomain = domain,
8        ClientId = clientId,
9        ClientSecret = clientSecret,
10        AuthorizationServerId = AuthServerId,
11        RedirectUri = redirectUri,
12        PostLogoutRedirectUri = postLogoutRedirectUri,
13        Scope = new string[] { "openid", "profile", "email" }
14    };
15    var issuer = UrlHelper.CreateIssuerUrl(.OktaDomain, oktaOptions.AuthorizationServerId);
16    var options = new OpenIdConnectAuthenticationOptionsBuilder(oktaOptions).BuildOpenIdConnectAuthenticationOptions();
17    var autoLinkOptions = new ExternalSignInAutoLinkOptions(enableAutoLinking, new[] { Constants.Security.WriterGroupAlias })
18    {
19        AllowManualLinking = false
20    };
21
22    options.Caption = "Okta";
23    options.ForUmbracoBackOffice("btn-microsoft", "fa-openid");
24    options.SignInAsAuthenticationType = Constants.Security.BackOfficeExternalAuthenticationType;
25    options.AuthenticationType = issuer;
26    options.SetBackOfficeExternalLoginProviderOptions(new
27    BackOfficeExternalLoginProviderOptions
28    {
29        AutoRedirectLoginToExternalProvider = false,
30        DenyLocalLogin = true,
31        AutoLinkOptions = autoLinkOptions,
32    });
33
34    app.UseOpenIdConnectAuthentication(options);
35}
The code should be easy to follow, it's mostly boilerplate but some things to note:
I am setting up the AutoLink option, this will automatically create an Umbraco user if they do not exist and assign them to the Writer group.
The FromUmbracoBackoffice() call incorrectly sets the AuthenticationType, so this is set to the correct value on line 25.
I have set the DenyLocalLogin to true, setting this to false will allow a user to login with either Okta or their Umbraco password.
I am using app settings in the web config file to pass through some variables.
1private readonly string clientId = ConfigurationManager.AppSettings["okta:ClientId"];
2private readonly string clientSecret = ConfigurationManager.AppSettings["okta:ClientSecret"];
3private readonly string domain = ConfigurationManager.AppSettings["okta:oktaDomain"];
4private readonly string redirectUri = ConfigurationManager.AppSettings["okta:RedirectUri"];
5private readonly string postLogoutRedirectUri = ConfigurationManager.AppSettings["okta:PostLogoutRedirectUri"];
6private readonly bool enableAutoLinking = bool.Parse(ConfigurationManager.AppSettings["okta:EnableUmbracoAutoLinking"] ?? "false");
7private readonly string AuthServerId = ConfigurationManager.AppSettings["okta:AuthorizationServerId"] ?? "default";
Step 3: Update the Web.Config
With the code setup, you can now update the web.config in the Umbraco website solution, replace the tokens in {}
1<!-- 1. Update this value -->
2    <add key="owin:appStartup" value="OktaOwinStartup" />
3
4    <!-- 2. Replace these values with your Okta configuration -->
5    <add key="okta:ClientId" value="{Your-Client-ID}" />
6    <add key="okta:ClientSecret" value="{Your-Client-Secret}" />
7    <add key="okta:OktaDomain" value="https://{Your-Okta-Domain}" />
8
9    <!-- 3. Update these values -->
10    <add key="okta:RedirectUri" value="{Website-Umbraco-Path}" />
11    <add key="okta:PostLogoutRedirectUri" value="{Website-Umbraco-Path}" />
12
13    <!-- 4. When Autolinking is true, Okta Authenticated users will be created in the
14            CMS Database with the permission of writer if they don't already exist -->
15    <add key="okta:EnableUmbracoAutoLinking" value="true"/>
Okta requires the site to be running in HTTPS, even when testing locally.
Step 4: Enabling Multifactor Authentication
Multifactor authentication (MFA) is handled by Okta and does not require any further Umbraco configuration. These instructions will be very brief as they may differ for various organizations depending on whether or not they have already setup MFA in the past.
In the developer console, select Security → Multifactor and create an policy if you don’t have one, make sure you have applied this policy to the group or people that login to the app. This part of the process also controls what happens the first time a user logins in or registers.
Choose your application of the Applications → Applications
On the Sign-in tab, create a policy to determine what happens when a user signs in. Here you control what happens every time a user logins in, such as force MFA, or only request MFA one a day.
That’s it! Umbraco and Okta will be working as one to keep your CMS back office safe and secure.

